Are you interested in creating a WordPress plugin but lack a starting point?
WordPress plugins enable the addition of personalized features to your website, with thousands available for free. Furthermore, the opportunity to craft custom WordPress plugins is at your fingertips.
This guide will demonstrate the process of creating a WordPress plugin and initiating your journey into WordPress plugin development.
A Guide to Creating Your Debut WordPress Plugin
In the realm of WordPress, plugins serve as the equivalent of applications for your website, much like the apps on your smartphone. They empower you to infuse new functionalities into your WordPress site effortlessly. If you’re curious to delve deeper into the world of WordPress plugins and understand how they function, our comprehensive guide on WordPress plugins is a valuable resource.
However, you might be thinking, “Does this mean I need to become proficient in coding languages like PHP, CSS, HTML, and JavaScript to craft a plugin?” It may seem like a daunting prospect, but fear not.
This tutorial is designed to make this learning journey accessible. We’ll take you through each step, breaking down the process into manageable portions. By the end of this tutorial, you’ll possess the foundational knowledge of WordPress programming needed to create a basic WordPress plugin. So, let’s embark on this educational adventure together!
Preparing for Your Maiden WordPress Plugin Creation
To embark on your journey of crafting your very first WordPress plugin, you’ll need to assemble the necessary tools and environments. Here’s what you should have at your disposal:
| Resource | Description |
|---|---|
| Local Development Environment | Establish a secure local development environment on your computer to test your WordPress plugin. If you need guidance, refer to our comprehensive installation guide for Windows and Mac. |
| Staging Website (Optional) | While not mandatory, a staging website can be used for plugin testing. Be cautious, as plugin errors may disrupt the site’s functionality, rendering it inaccessible to visitors. |
| Text Editor | A reliable plain text editor is essential for writing your plugin’s code. Basic options like Notepad or TextEdit are sufficient, but developers may explore more advanced code editors. |
Once you’ve gathered these essential resources, you’ll be well-prepared to embark on the exciting journey of creating your very own WordPress plugin.
Starting Out: Building Your First WordPress Plugin
Commencing your journey into WordPress plugin development is an exciting endeavor. To begin, follow these fundamental steps:
- Create a Dedicated Folder: Open your desktop or documents folder and initiate a new directory. Feel free to christen it with a name that resonates with your project, such as “wpb-plugin-tutorial” or “my-first-plugin.”;
- Forge Your Plugin File: Within your chosen folder, initiate a new file using your preferred text editor. Save this file inside the directory, ensuring it bears the .php extension. While the file name is customizable, it’s imperative to retain the .php extension for proper functionality. Whether you opt for “wpb-plugin-tutorial.php” or “my-first-plugin.php,” the choice is yours;
- Open the PHP file using your preferred text editor;
- Your initial task is to include the plugin header in your plugin file. This comment block serves as a communication to WordPress, providing essential information such as your plugin’s name, version, website, author name, and more;
- Once the plugin header is in place, proceed to insert the plugin code below it;
- In this tutorial, we’ll be creating a straightforward plugin that appends a message to the end of each article, encouraging users to follow us on Twitter;
- To implement this functionality, simply copy and paste the provided code beneath your plugin header block.
| 1234567891011121314151617 | function wpb_follow_us($content) { // Only do this when a single post is displayedif ( is_single() ) { // Message you want to display after the post// Add URLs to your own Twitter and Facebook profiles $content .= ‘<p class=”follow-us”>If you liked this article, then please follow us on <a href=”http://twitter.com/wpbeginner” title=”WPBeginner on Twitter” target=”_blank” rel=”nofollow”>Twitter</a> and <a href=”https://www.facebook.com/wpbeginner” title=”WPBeginner on Facebook” target=”_blank” rel=”nofollow”>Facebook</a>.</p>’; }// Return the contentreturn $content; }// Hook our function to WordPress the_content filteradd_filter(‘the_content’, ‘wpb_follow_us’); |
- Ensure that you remember to substitute the Twitter and Facebook profile URLs with your personal ones before saving your modifications;
- Next, navigate to your computer’s desktop and generate a zip file for the plugin folder;
- If you’re using a Mac, right-click on the folder and opt for ‘Compress wpb-plugin-tutorial.’ For Windows users, right-click on the folder and choose ‘Send to » Compressed (zipped) folder.’
Testing Your Debut WordPress Plugin: Installation and Activation
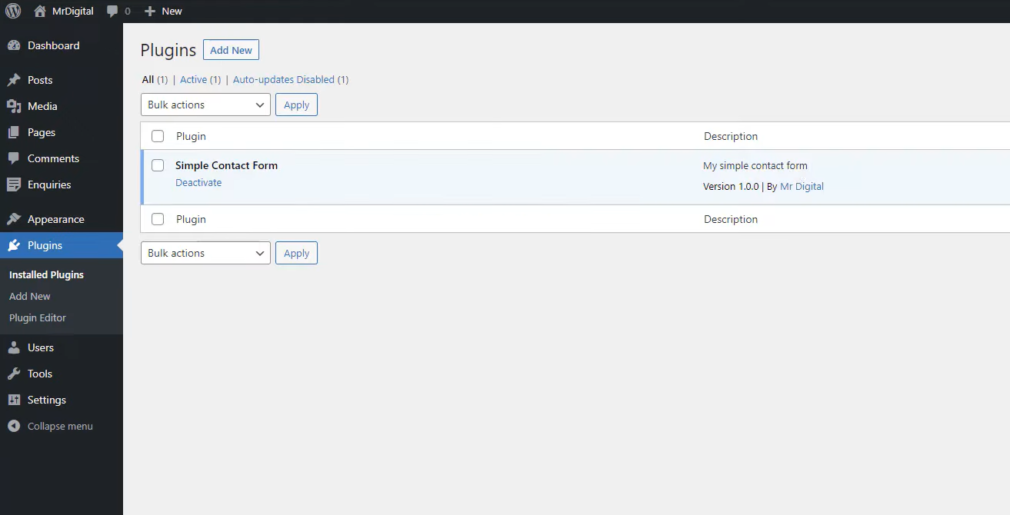
- With your plugin successfully created, it’s time to put it to the test;
- Take a journey to your website’s WordPress admin area and make your way to the ‘Plugins » Add New’ page;
- You should click on the ‘Upload Plugin’ button located at the top to initiate the plugin upload process. This action will reveal the plugin upload box;
- Now, proceed by clicking the ‘Choose File’ button to select the zip file you recently generated. Afterward, click on the ‘Install Now’ button to commence the plugin upload and installation process;
- Upon successful installation, don’t hesitate to activate the plugin;
- You can now navigate to your website to witness the plugin in operation;
- Upon visiting your single posts, you’ll notice a new paragraph appended at the end of each one.
Sharing Your Plugin on WordPress.org Plugin Repository
- To increase the visibility and usage of your plugin among other WordPress users, consider submitting it to WordPress.org’s extensive plugin repository;
- To begin the submission process, you’ll first need to create a ‘Read Me’ file for your plugin. Open a blank text file and save it as “readme.txt” within your plugin folder;
- The “readme.txt” file must adhere to WordPress.org’s specific readme file syntax. The information you include in this file will be prominently displayed on your plugin’s page within the WordPress.org repository;
- For a starting point, you can utilize the following sample “readme.txt” file to structure your own plugin documentation.
| 12345678910111213141516171819202122232425262728293031323334353637 | === Your Plugin Name ===Contributors: WPBeginnerTags: wpbeginner, plugin tutorialRequires at least: 6.0Tested up to: 6.2Stable tag: 1.0License: GPLv2 or laterLicense URI: http://www.gnu.org/licenses/gpl-2.0.html A WordPress plugin to teach beginners how to write a WordPress plugin. == Description == This simple plugin is part of our beginner’s guide to writing a WordPress plugin. == Installation == 1. Upload the plugin folder to your /wp-content/plugins/ folder.1. Go to the **Plugins** page and activate the plugin. == Frequently Asked Questions == = How do I use this plugin? = Answer to the question = How to uninstall the plugin? = Simply deactivate and delete the plugin. == Screenshots ==1. Description of the first screenshot.1. Description of the second screenshot. == Changelog === 1.0 =* Plugin released. |
Let’s delve into an explanation of the WordPress plugin readme file syntax so that you can tailor it to suit your plugin’s needs.
- The first line of the plugin’s readme serves as your plugin’s name, which will be displayed as its title in the WordPress.org plugin directory;
- Following that, there’s the “Contributors” line, featuring the user IDs responsible for managing your plugin on WordPress.org. If you haven’t created a WordPress.org user account yet, you can easily do so to obtain your user ID;
- “Requires at least” and “Tested up to” pertain to the WordPress versions that your plugin is compatible with. The “Stable tag” signifies your plugin’s version;
- You can leave the “License” fields set to GPL and maintain the URL as is;
- The “Description” section is where you can provide a concise explanation of your plugin’s functionality;
- After editing your plugin’s readme file, be sure to save your changes.
With your readme file in order, your plugin is now ready for review by the WordPress.org plugins team. To submit your plugin, you’ll need a free WordPress.org account. Visit the “Add Your Plugin” page, and if you’re not already logged in, simply click the “Log In” button in the top right corner of the screen.
Once you’ve successfully logged in, you’ll gain the capability to upload and present your plugin for review. All you need to do is click on the ‘Select File’ button to pick your plugin’s zip file and then proceed by clicking the ‘Upload’ button.
The WordPress.org plugin review team will meticulously examine your plugin’s code, checking for common errors and conducting security assessments. Upon successful approval, you can anticipate receiving an email from the plugins team.
Inside this email, you will discover a link directing you to your plugin’s Subversion (SVN) repository, hosted on WordPress.org.

Leveraging Subversion (SVN) for Uploading Your Plugin
Subversion serves as a robust version control software, facilitating file and directory modifications while meticulously maintaining a historical record of alterations, effectively managing multiple versions, and fostering collaborative efforts.
To proceed with uploading your plugin to WordPress.org, it’s essential to have an SVN client installed on your computer.
For Windows users, both SilkSVN and TortoiseSVN (both free) are suitable options. Mac users can opt for SmartSVN or the Versions App to install on their computers.
Once you’ve installed your preferred SVN client, the next step is to open the Versions app and initiate the process by checking out a copy of your WordPress plugin’s repository. Simply commence by clicking on the ‘New Repository Bookmark’ button.
This action will trigger a popup dialog. To begin, you should assign a name to this bookmark, which can be your plugin’s name for clarity.
Following that, you’ll be required to input the URL of your WordPress plugin’s SVN repository.
Proceed by selecting the ‘Create’ button to establish a connection with your repository.
The Versions App will subsequently initiate the download process, retrieving a copy of your plugin’s repository to your local computer. Next, within the browser view, right-click on your repository name and opt for ‘Checkout’.
You’ll be prompted to specify a folder name and designate a location for storage on your computer. To keep things organized, you can use the same folder name as your plugin directory. Then, proceed by clicking the ‘Checkout’ button.
The Versions app will now generate a local replica of your plugin on your computer. You can locate it within your plugin’s repository or explore it via the Finder app.
Next, you should duplicate your plugin files and insert them into the trunk folder within your local repository.
As you perform this action, you’ll observe a question mark icon accompanying the new files in the Versions app.
Given that these files are new additions, you’ll need to take the step to ‘Add’ them. Simply highlight the new files and then click on the ‘Add’ button to incorporate them into your local directory.
With your plugin files now included in Subversion, you’re all set to proceed with the upload process. Essentially, this involves synchronizing the changes between your local folder and the Subversion directory.
- Begin by selecting your local repository, and then activate the ‘Commit Changes’ button to initiate the process;
- A fresh pop-up dialog will surface;
- Within this dialog, you’ll encounter a comprehensive list of alterations along with a field to input your commit message;
- Your SVN application will now initiate the synchronization process, committing your changes to your plugin’s repository.
Now that your plugin files are uploaded to the trunk, the next step is to create version tags. Begin by navigating to the local copy of your plugin and copying the contents of the trunk folder. Then, access the tags folder and establish a new folder within it.
- Give this folder a name corresponding to the version number, ensuring it matches the version indicated in your plugin’s header. In our provided sample code, it is used “version 1.0” for our plugin;
- Once you’ve added the “1.0” folder to the /tags/ directory, you’ll notice a question mark icon adjacent to the folder name within the Versions app;
- Since this is a newly created folder, you’ll need to click on the ‘Add’ button to incorporate both the folder and its contents into the repository;
- Following that, proceed by clicking the ‘Commit’ button to align your changes. Feel free to continue editing your plugin files within the local copy.
When you’ve completed your modifications, a straightforward click on the commit button will synchronize them with the WordPress.org repository.
Should you have introduced substantial alterations to your plugin, it’s advisable to create a new version by establishing a folder named after the version number. Ensure that this version number corresponds to the one indicated in your plugin’s header.
With your updates securely in place, you can now preview your plugin within the WordPress.org plugins directory.
Incorporating Visual Elements into Your WordPress.org Plugin
WordPress.org offers the capability to enrich your plugin with artwork and screenshots, provided they adhere to specific naming conventions and are uploaded through Subversion.
Plugin Header Banner
This substantial image graces the top of your plugin’s page, available in dimensions of either 772 x 250 or 1544 x 500 pixels, saved as jpeg or png files. Naming conventions should always follow this pattern:
- banner-772×250.jpg or banner-772×250.png;
- banner-1544×500.jpg or banner-1544×500.png.
Plugin Icon
A smaller, square-shaped image file serves as your plugin’s icon in search results and plugin listings, available in dimensions of either 125 x 125 or 250 x 250 pixels, in jpeg or png formats. The icon file should adhere to the following naming structure:
- icon-128×128.jpg or icon-128×128.png;
- icon-256×256.jpg or icon-256×256.png.
Screenshots
Screenshots should be named in the following format:
- screenshot-1.png;
- screenshot-2.png.
You can include as many screenshots as you desire, and they should align with the order of screenshot descriptions as presented in your readme.txt file.
Once you have prepared all the necessary artwork, insert them into the assets folder within your local copy of the plugin.
Subsequently, you will observe a question mark icon adjacent to the assets folder. Click the ‘Add’ button to introduce the new asset files to your repository.
Ultimately, proceed by clicking the commit button to initiate the file upload process to the WordPress.org repository. After a brief interval, you’ll witness the artwork gracing your plugin page.
Further Resources for WordPress Plugin Development
WordPress plugins span a broad spectrum, ranging from the simplicity of the example we provided earlier to the intricacy of eCommerce plugins, membership plugins, contact forms, and photo gallery plugins, among others.
Intriguingly, these more advanced WordPress plugins can further expand their capabilities through the integration of addons—essentially, plugins that enhance the functionality of other plugins.
If you’re eager to delve deeper into the world of WordPress plugin development and explore additional ways to augment your plugins’ capabilities, consider the following resources:
- Adding Shortcodes in WordPress: Discover how to incorporate shortcodes into your WordPress plugins to offer convenient and customizable functionality;
- Harnessing the Power of functions.php: Uncover clever tricks and techniques that can be harnessed in your site-specific plugin by leveraging the functions.php file;
- Creating Custom Post Types and Taxonomies: Learn the art of crafting custom post types and taxonomies, providing a tailored content structure to suit your plugin’s unique needs;
- Effective Stylesheets and JavaScript Handling: Explore best practices for seamlessly integrating stylesheets and JavaScript into your WordPress plugins, ensuring optimal performance and compatibility.
These resources will empower you to expand your WordPress plugin development skills and enable you to create more dynamic and feature-rich plugins for your WordPress site.
Conclusion
This comprehensive tutorial has provided a detailed roadmap for creating a WordPress plugin, suitable for both beginners and experienced developers. With a strong foundation in plugin concepts and coding techniques, you now have the knowledge and confidence to begin your plugin development journey. By following the step-by-step guidance, you can effectively enhance your WordPress website with custom features. As you further hone your skills, you’ll be well-prepared to tackle more complex projects and contribute to the WordPress plugin community.